In May I was approached by the Federation of Canadian Artists (FCA) to hold a summer plein air workshop and to write an article for their July/August Art Avenue magazine.
To tie the article in with the workshop I decided to write about my approach to plein air painting and show my process step by step. The painting i chose for the step by step is also available to watch on my YouTube channel (video embedded below).
You can read the article below or download the PDF directly.
My Approach to Plein Air Painting
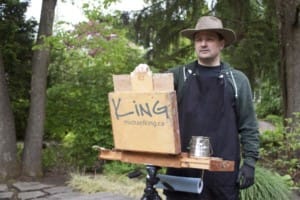 I started plein air painting seven years ago, just on the cusp of its progression to popularity. The fact that I could do it anywhere, just leave the house and go, no photos needed, is what appealed to me.
Over time you learn what draws you in. I prefer strong shadow patterns, trees and structures such as barns, power poles or a meandering river. What keeps me coming back, however, is the challenge.
My plan for plein air painting is to scope out a desired location, taking into consideration the sun’s travel in the sky, and lay down some sketches in my sketchbook along with a few value studies. All to work out the design, composition and eye travel before I start.
I have stuck to this plan on many occasions and I can say from experience it does work. My paintings end up more complete. Not necessarily finished, just more complete. But, plans change and steps are skipped. I’ll walk up to a scene, setup and, win or lose, I paint.
So why wouldn’t I always follow my plan? For the challenge of it and because I like to paint more than I like to sketch. This does often lead to failure, though, which I embrace. I have an education in design but not fine art. I never had the opportunity to fail in art school. I need to fail now to learn. I think everyone does. Failure is addictive; it’s my educational ‘crack’. The more I fail, the more I learn not to fail. Painting then becomes easier.
How do you learn from your mistakes? Rely on your current knowledge of painting, ask a friend or a mentor to critique your work, join a critique group or post in an online forum. What matters is to understand the mistakes made.
Enough about ideologies, let’s get into a painting.
- Fig 1
- Fig 2
- Fig 3
- Fig 4
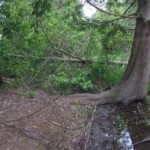
I had painted this tree before; however, the spot I usually paint from was taken over by a fallen tree (Fig 1). Reassessing the scene, I wandered looking for a good light and shadow pattern.
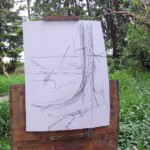
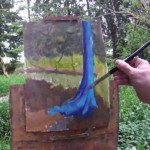
Since this was during the Opus Outdoor Painting Challenge and I had painted this tree before, I just wanted to dive right in. I mentally established the composition of the painting as I setup my gear, then sketched the concept directly on the board after I was setup (Fig 2).
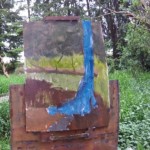
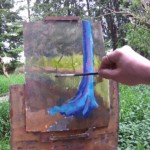
I followed with a rough block-in of colour of the subject, ground plane, foreground and background shapes (Fig 3). The key was to make my best judgement on values and then adjust them on the second pass.
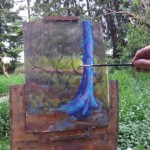
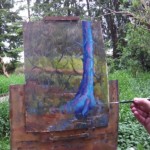
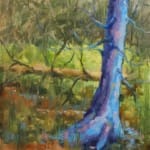
The second pass aimed to add more dimension. The tree gets a light side, a dark side and a new violet midtone; bringing the tree to life. (Fig 4).
- Fig 5
- Fig 6
- Fig 7
- Fig 8
I started altering values to add more depth and to ensure a lead in to my focal point. On location, the grasses behind the tree looked of one value but I darken most of the grasses on the far left to create a gradation of dark to light with the intention of guiding the viewer towards the tree (Fig 5).
This worked, but I wanted to move the eye more quickly to the tree so I increased the value and chroma of the grasses where the back meadow meets the trunk of the tree (Fig 6). This provided a stronger value and temperature gradation in addition to increasing the contrast between the shadow side of the tree and the meadow.
Indication of detail was added with a rigger brush by flicking in grasses and twisting in water reflections (Fig 7). Adding these smaller strokes within the larger broad strokes gave an illusion of detail without having to paint it all. For some texture, I used the butt of my brush and scratched into the paint in various locations.
The final pass was about tweaking values and adjusting edges; softening some in the outlying areas, while sharpening others in and around the focal point.
It seemed Mother Nature had a plan for me that day; having the fallen tree in the background really made it a stronger composition. I title it “Fallen Brethren” (Fig 8).
In the end, plein air painting is more about leaving information out, than it is about putting it in. Pay attention to your focal point and let the peripheral information be there for context.
– Michael

Thank you for this beautiful information.
I am learning to paint more or less using your stile. It is unfinished but completed as you mentioned
Thank you for sharing your process for this painting. You’ve created an eye-catching painting.
I’m interested to know why you chose the colour you did for the focus tree. Local colour in the photo didn’t seem to suggest such a strong blue.
regards,
Peter
I knew wanted it to stand out and be different from the rest. The scene had a lot of green and brown in it so I went for blue. I think I was at a stage where I was trying to paint objects with a different colour, than they had, as a challenge to myself. :)